• What it is
  • Why use us
  • Testimonials
  • Pricing
  • Blog
Menu
  • What it is
  • Why use us
  • Testimonials
  • Pricing
  • Blog
Login
Learn More

Advanced Options

  • How To Upload Files That Won’t Expire So You Can Safedrop Them Over And Over Again. ‘Advanced’ Interface Guide
  • Safedrop Admin
  • How To Edit Terms Of Use, Audit Retention And ‘Remember Me’ Times And Change Your API Target Folder (Advanced)
  • How To – Templates
  • How To – eForms
  • How To – eSignatures
  • Safedrop Reminders
  • How To – Change the background image and quotes

FAQ

  • How To – Use Safedrop Inbox
  • Using Inbox To Receive Files
  • How To Use The Zylpha Safedrop App
  • How To Receive Your Safedrop
  • How To – Send a Safedrop
  • How To – Track a Safedrop
  • Issues accessing safedrop on Chromium Browsers

Getting Started

  • Safedrop Service Guide
  • Free User Safedrop Service Guide
  • Safedrop Dashlet Service Guide
  • Safedrop Outlook Plugin Guide
  • safedrop User Roles & Permissions
  • Home
  • Help
  • Advanced Options
  • How To – eForms

How To – eForms

Permissions Required: Manager

How To Video

How To Enable eForms

Step 1

Click on Document Library From within the Projectfusion Dashboard

Step 2

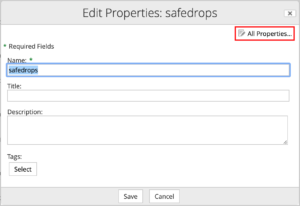
Click On Edit Properties on your safedrop folder

Step 3

Click on all properties
Step 4

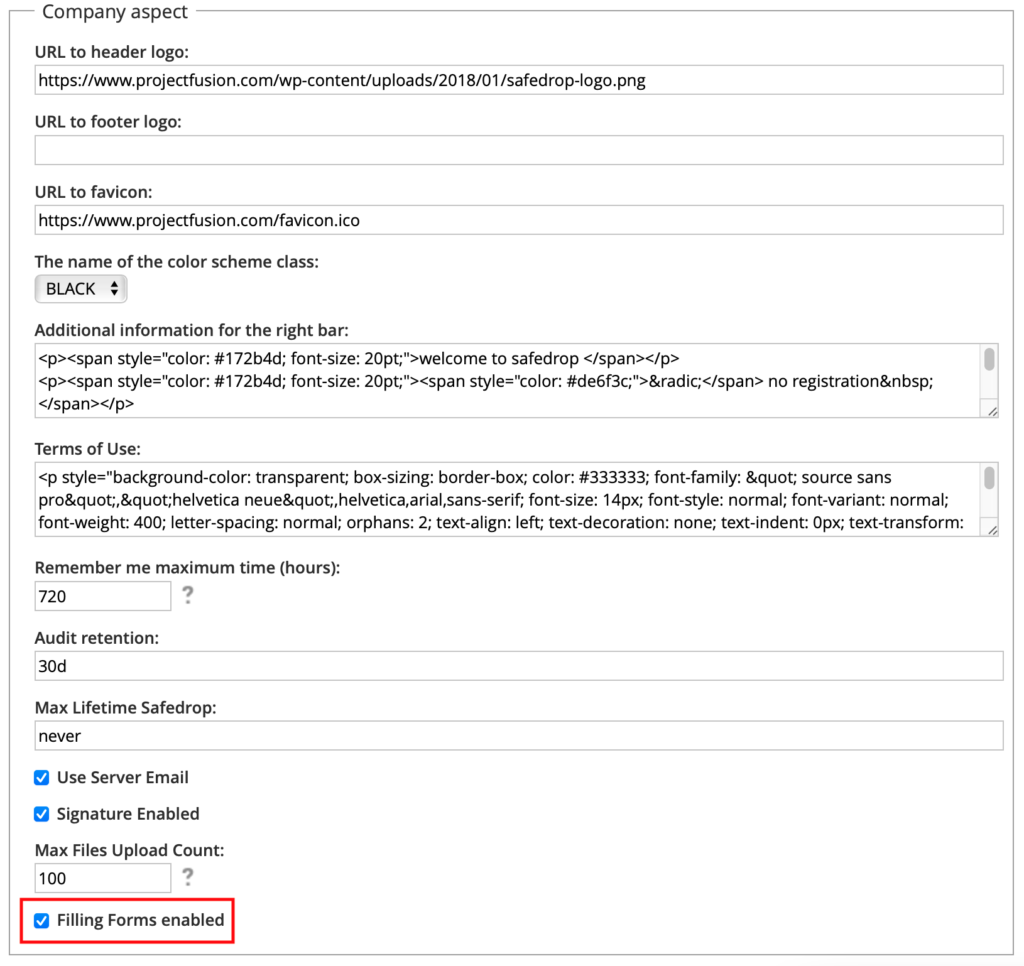
Ensure filling forms is enabled and hit the save button at the bottom.
Wrap Up

Once this is done Form Filling will be enabled on your safedrop service and you can progress as normal with sending a form.


How To Send and Edit an eForm

Step 1

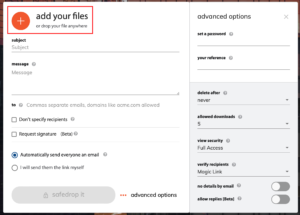
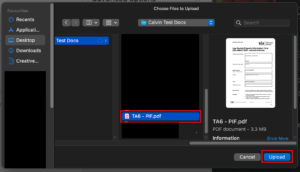
Attach your form to the safedrop as per usual. you can do this by pressing add your files or drag and drop.
Step 2

Adjust your options as required the default is usually okay unless you require something specific. if you would like a completed copy in your inbox once the form is filled in just make sure no details by email is disabled this is the default however if this is enabled you will have to download as specified in step 6.
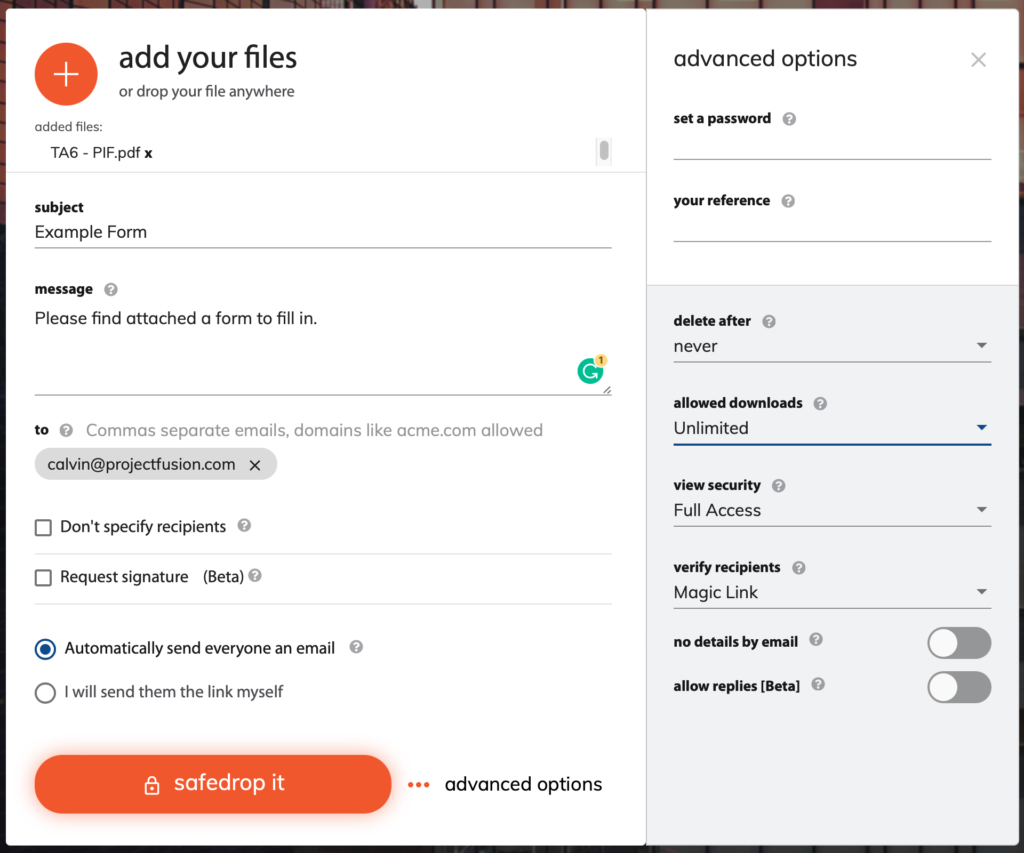
Step 3

Click either the blue text or the eye logo to view and edit your eForm you can do this as the sender or the recipient depending on your needs at the time.

Step 4

Click on the blue boxes to edit your eForm there are many types of editable details including Text, Date and Signature are just a few examples. you can save your progress at any point and come back to it later if needed by pressing the save button in the top right-hand corner.
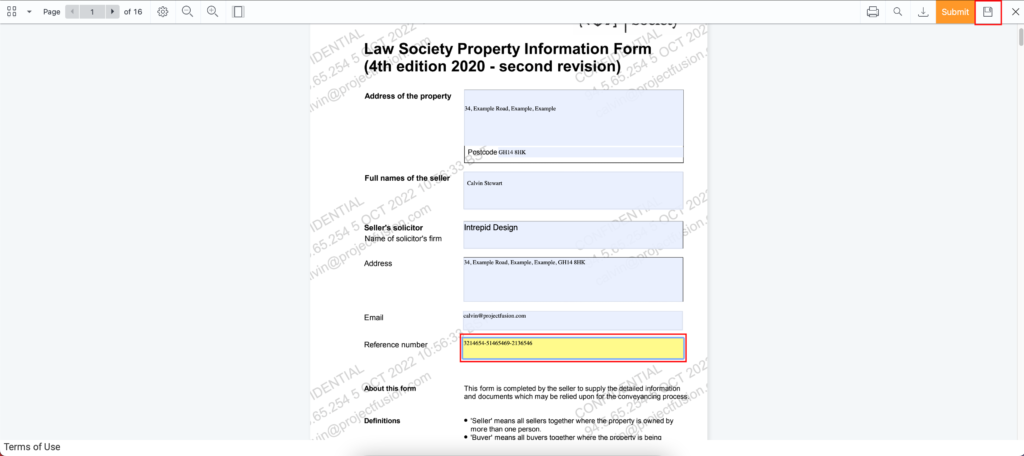
Step 5

Once you are satisfied everything is completed and ready to be downloaded or sent on for another process just press submit and all changes will be locked and finalised.
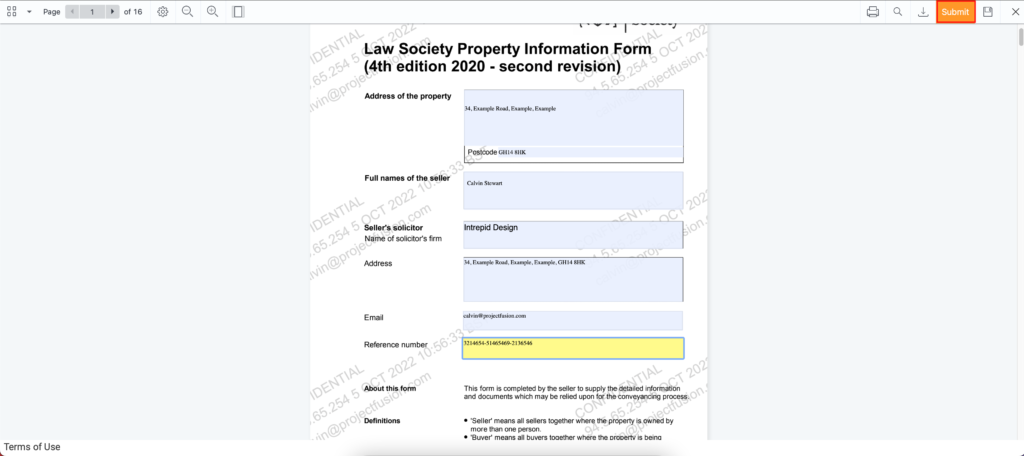
Step 6

Once you have submitted your changes you can then download this completed eForm by clicking the blue text, the download logo, or donweload as zip by pressing the indicated buttons in the picture below.


We hope this guide helps and if you require any further assistance please just email us at support@projectfusion.com

What are your Feelings
Share This Article :
  • Facebook
  • Twitter
  • LinkedIn
  • Pinterest
Updated on November 7, 2022
How To – TemplatesHow To – eSignatures

Privacy Policy | Terms

© 2025 OD Consultancy Ltd. OD Consultancy is a UK limited company trading as safedrop & PROJECTFUSION.

OD Consultancy is located in Innovation House, Discovery Park, Sandwich, Kent CT13 9FF.

safedrop is bought to you by the same team that created Projectfusion

Linkedin-in Facebook-f
We give 1% of turnover to charity!

You can also reach us on +442077394252

We use cookies to ensure a smooth browsing experience. By continuing we assume you accept the use of cookies.
Cookie settingsACCEPT
Privacy & Cookies Policy

Privacy Overview

This website uses cookies to improve your experience while you navigate through the website. Out of these cookies, the cookies that are categorized as necessary are stored on your browser as they are essential for the working of basic functionalities of the website. We also use third-party cookies that help us analyze and understand how you use this website. These cookies will be stored in your browser only with your consent. You also have the option to opt-out of these cookies. But opting out of some of these cookies may have an effect on your browsing experience.
Necessary
Always Enabled
Necessary cookies are absolutely essential for the website to function properly. This category only includes cookies that ensures basic functionalities and security features of the website. These cookies do not store any personal information.
Non-necessary
Any cookies that may not be particularly necessary for the website to function and is used specifically to collect user personal data via analytics, ads, other embedded contents are termed as non-necessary cookies. It is mandatory to procure user consent prior to running these cookies on your website.
SAVE & ACCEPT