Compose your safedrop
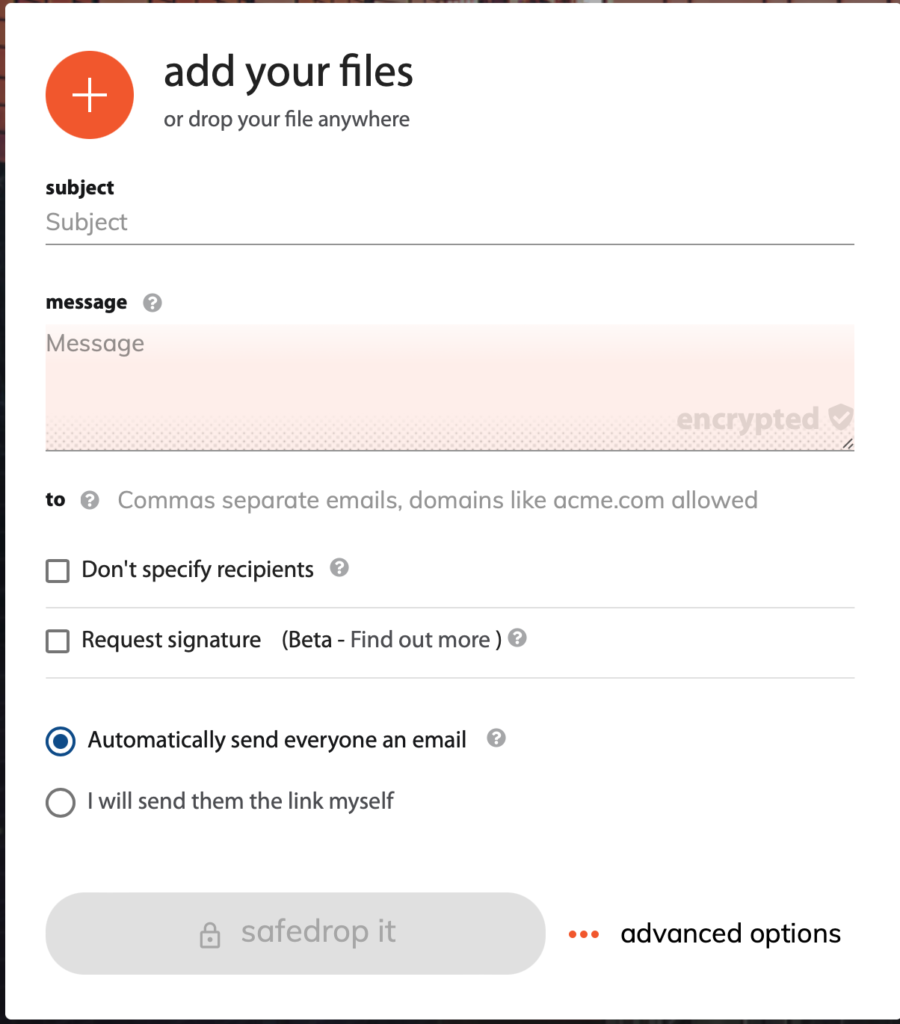
After logging in for the first time and changing your password, you will be brought to the Compose page. You can use this page to send your safedrops. (See below)

1. Adding files to your safedrop – To add files to your safedrop, you can either drag and drop files from folders or your desktop, straight into your browser or click on the orange circle to open a folder browsing window where you can select the files you wish to add.
2. Email address – This is the field where you enter the email address of the safedrop recipient/s.To send the safedrop to more than one recipient, enter the first recipient’s email address and then press enter. You can then enter the emails of the other recipients pressing enter at the end of each address. (If you’re sending a safedrop as a Secure link to multiple recipients, make sure you do not have self destruct enabled otherwise only 1 of the recipients will be able to access the file)
3. Expiry – The expiry of the safedrop can range from 1 hour to forever. You can change this depending on how long you would like the safedrop to be active i.e. how long you want the files to be available to download. When the safedrop expires, the recipient or anyone with the secure link will no longer be able to access the safedrop or the files within and the file will be deleted from our server within 2 minutes of the expiry time.
4. Allowed Downloads – This controls the number of downloads per file. If 1 is selected, the file/s sent will self destruct after 1 download; the file/’s will no longer be available to download. If ‘Unlimited’ is selected, there will be no download limit for the file/’s and they will be available to download until the safedrop expires or the sender expires the safedrop manually.
5. View Security – There are two options to choose from in this drop down menu. Full access allows the recipients to both view and download the files in the safedrop. View on-screen only allows the users to preview the files online and does not allow them to download them at all.
6. Verify recipients – There are three options in this drop down menu: ‘secure link’ and ‘email verification’.
Off– the recipient receives an email with a link to download the safedrop.
Enter Email address – the recipient is first prompted to enter their email address before being allowed access to their safedrop.
Magic link (recommended) – the recipient must first click on a magic link that is sent to their email address to verify their identity. This adds an extra layer of security and allows the reply function to be used.
7. Encrypt message – Leaving this toggle unticked displays the message to the recipient in the safedrop email that is sent. Ticking this toggle does not display the message in the safedrop and the recipient has to click on the link to view the message in the safedrop.
8. Allow Replies [Beta] – This feature, available only when Magic link verification has been selected, allows the safedrop recipients to reply and attach files to the safedrop. Those files are then viewable and downloadable by both the original safedrop sender and all recipients.
If you would like another layer of security added to your safedrop, you can always use the Password feature at the top of the advanced options menu. Simply add your password in that box to encrypt the safedrop further, just don’t forget to let your recipients know what it is!
After you have filled in all the necessary fields, and are ready to send the safedrop, you can either choose Automatically send everyone an email or I will send them the link myself.
Clicking ‘safedrop it’ with Automatically send everyone an email chosen will send the recipient/s and email with the link to collect the safedrop. Clicking ‘safedrop it’ with I will send them the link myself chosen will direct you to a page with the link needed to access the safedrop, you can then copy this link and send it to anyone you like and they will then be able to access the files.
If you send a safedrop without specifying a recipient, a link will be generated and you can copy and paste the link to whoever you want.
Track and manage your safedrops.
To view a list of all your current safedrops, click on the ‘Track Safedrops’ button at the top of the page.

As you can see above, each of your user’s safedrops will be shown here. You can see the date sent, the subject of the safedrop and the recipient email addresses.
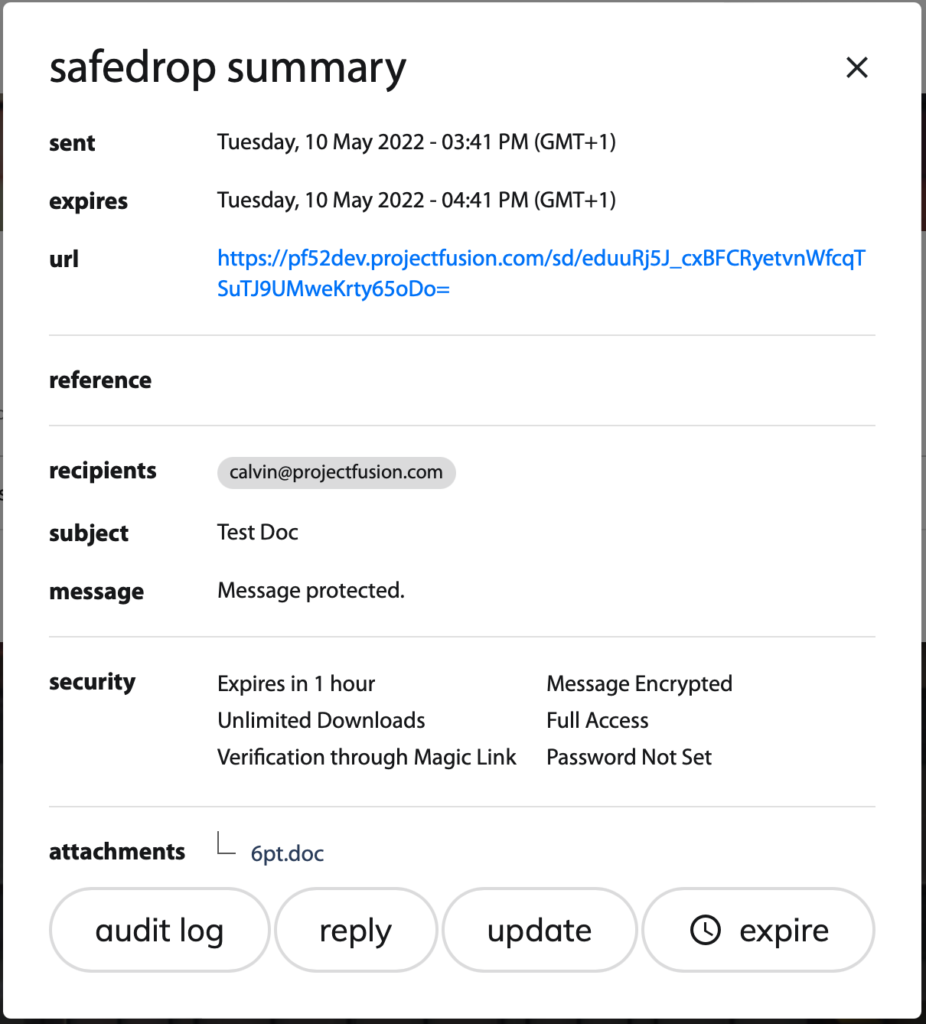
Clicking on the line of each drop will open up the safedrop details showing the security settings used and the names of any attachments.

Clicking ‘audit log’ will display the safedrop audit trail.

From here, you can see the time and date the safedrop was sent and the recipient details including when they downloaded the file and what their IP was.
Clicking expire safedrop will open a pop up confirmation window and clicking ‘Yes’ will delete the safedrop, regardless of its expiry time.
This means that even if the recipients still have a link, they will not be able to access the safedrop.
You will then receive a ‘Safedrop Expired’ message to confirm to you that the safedrop has been deleted and the files are no longer accessible. The file/s will then be deleted from the API target folder within the next 2 minutes of the expiry time.
If your site has allowed audit retention then you will be able to see your expired safedrops by clicking on the ‘expired’ tab in the track safedrops page.


